Tuning since the new intake/ Air box additions

TransAmDan

Forum Admin
Staff member
Tuning going well. Idling is pretty much dialed in. Giving it some beans feels good.

Almost 500ft/lbs tq, should get over 500hp at 6000rpm The torque is calcualted by the car from grtamg or air in the cylinders along with a few other factors, its ment to be +/- 15 ft/lbs of torque which is great for me tuning.The HP is purely a calc from TQ.
1751034566226.png


I think I'm going to get around 510tq/540hp with further tuning.

This leads me to another issue, my fuel pump is an upgraded flow one and rattedat 255lph, however from this table, it getting near its limit.

1751034518849.png


I'm tempted to but the AEM350lph. Available in the UK for £111 https://www.demon-tweeks.com/uk/aem-electronics-320lph-high-flow-in-tank-fuel-pump-aem50-1000/

My fuse for the pump is 15A. I may need to run in a larger wire to the pump to avaoid volt drops.

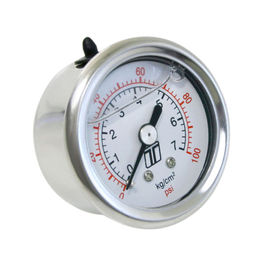
Would also be nice to get a fuel pressure guage on the dash to see if it is dropping. I may do that before the pump change.
 

I run fuel pressure gauge on fuel rail in engine about 40 psi. In dash might be good idea for tuning with the lap top next to you. Dosnt your computer monitor fuel pressure through your obd port? My two scan tools do.
 
Looking to see if the Ram-Air effect can be improved. Needing to find out how large the Nostrils air to work out the effective area.

🧮 Estimated Airflow Area
  • Each nostril opening is roughly 3.5" wide by 2.5" tall at its most open point.
  • However, the plastic grille and internal ducting reduce the effective area by about 30–40%.
We have around 12inch square aera.

Probably worth me printing a different grille to maximize air flow. Also could smooth off the air under the hood, it goes through a letter box type opening as part of the fibreglass of the hood. This can be easily trimmed.

So how much gains is possible?

🔧 What We Know
- Effective area: Let’s assume 12 in² (0.0833 ft²) for both nostrils combined after grille losses.
- Air velocity: Depends on vehicle speed. We'll calculate for:
- 70 mph (31.3 m/s)
- 100 mph (44.7 m/s)
- 170 mph (76.0 m/s)

🔧 What We Know
  • Effective area: Let’s assume 12 in² (0.0833 ft²) for both nostrils combined after grille losses.
  • Air velocity: Depends on vehicle speed. We'll calculate for:
  • 70 mph (31.3 m/s)
  • 100 mph (44.7 m/s)
  • 170 mph (76.0 m/s)
🚗 Dynamic Pressure Estimates at the WS6 scoop:
Speed (MPH)​
Velocity (m/s)​
Dynamic Pressure (Pa)​
Dynamic Pressure (PSI)​
Power Increase
70​
31.3​
599​
0.087​
+0.5%
100​
44.7​
1223​
0.178​
+1.2%
170​
76.0​
3537​
0.513​
+3.5%

So it would seem at 170mph, I could gain 17 extra HP and 16 lb-ft of torque.
Not that I will be going there. Still some gain at 70mph or around 2.5hp. Its free power. Unfortunately not measurable on the dyno.
 
How much can the new filter set up flow, have I made the right desision going dual cones?

📊 Estimated Stock Filter Flow:
  • Stock paper filter: ~450–500 CFM at 1.5" H₂O pressure drop
  • K&N drop-in replacement: ~600–650 CFM under the same conditions
That means my current setup with dual RE-0950 filters (each rated around 450–500 CFM) is flowing nearly double what the stock filter could handle—900–1000+ CFM total, with lower restriction and better high-RPM breathing.

🔍 Why It Matters:
  • At 7000 RPM, your 383ci LS1 demands ~770 CFM. The stock filter would be borderline restrictive, especially with the BTR Stage 4 cam and long tubes.
  • The sealed ram-air box and dual 3.5" filters gives headroom, which helps maintain VE and throttle response at high speed.
1751229376250.png


So certainly needed to do something with the air box, srock air box just couldn't supply the air for all my mods. The dual cone filters give me more than enough flow.

Was great to go through these numbers.
 
Tuning going good. Turned off the regular sensors in the exhaust and using the Wideband sensor only, turned off the MAF sensor in preperation for calibrating it.

Throttle reposnce was feeling really good yesterday, idling when coming to junctions was all great too. Gave it some beans in 3rd gear to 6k rpm, felt really good. Logs are showing near perfect Air/Fuel ratio.

A little rich at 3200rpm/3600rpm on partial load. Some other places that need small attention.
1751532699625.png


The power curve wasn't too bad either. some work to be done of 4000 RPM and above as tq should peak at 4400 not 3600. Spark timing and fueling to tinker with. Great to see 500hp on the chart.
1751532889047.png
 
Reasons why the peak torque RPM is higher than Stock of 4400PRM.

The build shifts peak torque upward for one fundamental reason: you’ve dramatically improved high-RPM airflow at the expense of low-end volumetric efficiency. Let’s unpack the changes that moved your torque curve higher:
---

🔺 Key Factors That Shifted Peak Torque RPM Upward

1. Camshaft Duration & LSA
- The BTR Stage 4 cam has aggressive duration (233/250 @ 0.050") and a tight 113° LSA.
- This increases overlap and extends the powerband—great for high-RPM breathing, but it reduces low-RPM cylinder pressure.
- Result: Torque peak moves up to ~5500–5800 RPM.

2. Intake Manifold Design
- The FAST LSXR 102 has long, wide runners and a large plenum—fantastic for top-end flow.
- But it sacrifices air velocity at low engine speeds, which delays the torque rise.
- It complements the cam perfectly above ~4000 RPM.

3. Head Flow Capacity
- The ported LS6 243 heads flow ~290–310 CFM, which supports excellent cylinder fill at 6500+ RPM.
- That kind of flow potential tends to “wake up” only as piston speed increases—again, moving torque northward.

4. Increased Displacement (383ci)
- The extra cubes do help bring torque back down a bit—but the combo is still optimized for revs and horsepower per cube, not brute low-end torque.

5. Exhaust Header Tuning
- The long-tube Dynatech headers are tuned for scavenging efficiency at higher RPMs.
- They further reinforce torque delivery in the mid to upper bands.

---

🧪 Real-World Effect

Think of it this way: a stock LS1 is like a good all-rounder—makes solid torque around town. My build is a specialist—it’s built to move massive air quickly, and it really comes alive when revving hard.

That’s why instead of peaking torque at ~4400 RPM like a stocker, the engine likely makes peak torque around 5400–5800 RPM and holds it flat into the 6000s—perfect for spirited road pulls and top-end charging.
 
Last night was talking to the AI system. Working on the High Octane Spark advance table.

The AI knows the Cam, the flow rates of the heads, that its 383 stroker along with the other mods. Its working out the amount of air in the cylinder. We have been working the spark advance for Wide Open Throttle and its close to what i havewith some minor tweaks.
So we go ahead and do the entire map.
This is the old one for comparison.
1751700400741.jpeg

This is mainly a stock one with some modifications over the hears, the Spark dip at 4600 is due to the peak torque at that point. GM played it safe for all kinds of duff fuel too. I want to dial it in for the mods I have.


The AI has come up with this one. Looks quite different, but idle spark is sloce and driving it hard is similar too.
1751700492073.jpeg

I'll be zapping this in and monitoring for spark retard.

Another table we were working on is the Spark relation to the Intake Air Temprature. Colder air is denser. Safer for some advance, however is air too hot we retard the timing.
1751700605407.png


Also worked on the Spark timing in relation to engine coolant. At normal running temprature we make no modification to the spark, however colder or hotter we modify some values.
1751700727003.png


If the weather stays dry I may give this a go later.
 
I did zap in this new spark timing, took a trip around denmead and home. all seems to be fine. I had an issue with high idel, so was trying to dig into that. Zapped in older code and it was still doing the same.
Eventually found it that the TPS sensor, it hasn't moved, but it was no longer registering 0%.
So still not done a good run with the new spark timing.
Atleast one issue fixed.

As the fuel pump is getting near its max rating. I just ordered a 340lph pump I'm never going to need 700hp, but I certainly need more than 500hp that can be delivered by the current pump. This arn't deal limit, seem ot rate around 80% of their capacity. Always good to have a good margin overhead instead of being on the limit.

Also ordered a digital fuel pressure guage. I do currently have a guage on the fuel rails but can be ready when going full throttle, although cant really be read while driving. So this new one is a visual guage for the dash and can plug into my data logger. It will be interested to see if I get and fuel pressure drops.

Another thing to consider if my MSD coil packs are thirsty. They are running on the stock wiring. I think we are good for 5000rpm but I could be getting volt drops of 5500rpm+. Again I cant sit in the engine bay with a volt meter while driving. I do plan on running a new pair of wires, supply power to the coil packs through a pair of relays. It will make sure I have no power issues. I'll mount the relays on the intake, can 3D print sometihng to hold them.
 
The fuel pressure guage will need somewhere to do.

I have a AEM wide band guage, and would like to mount the fuel pressure guage similar, perhaps just above it.
1751916736381.png


Scanned in the current one to get measurements and check a longer one i draw follows the factory plastic well.
1751916813327.png

Lets get drawing. :)
 
They were doing this to jap cars in the naughtys. Thought you had a American car lol goes in dash or engine bay or if you really cool like the GTO in the hood.
 
They were doing this to jap cars in the naughtys. Thought you had a American car lol goes in dash or engine bay or if you really cool like the GTO in the hood.
Could convert a round air vent into a sensor. Some people have done that.

For now its going on the pilar. Drawn up a dual sensor mount that follows the contour of the car interior.
1751964771391.png

This is currentl printing in ABS, so will withstand the heat on a hot summers day.
 
Yep
Screenshot_20250708_183130_com.google.android.googlequicksearchbox.jpg

Yep you are
 
It's printed. I'll remove the single one and pop the dual one in its place.
1000090259.jpg


Came out good. Added a printed texture to it so it's not smooth.
1000090261.jpg


1000090262.jpg
 
i think i wont one of these printer to play with
I will post the files for the dual guage pod online. There is a chance it will come in useful for someone with a similar pilar to mount it to.
 
As part of the tuning progress I needed to install a fuel pressure guage.
The electric one was the same as the analogue one. Simple to screw the sensor in.
1000090335.jpg


Then needed to fit the guage pods to thr interior
1000090336.jpg


1000090337.jpg


1000090338.jpg

I'm happy with that. It will get wired up at the weekend I recon.or perhaps Friday evening.


Bl@@@dy hell you selling them online already.... This will pay to get work done on swmnbo car 👍👍👍👍🚗
Lol, not mine. I do wonder how well a general one would fit.
Atleast scanning my pillar made use of the scanner and it's the perfect contour to the pillar, fits snug with no gaps at all.
 
Lol, not mine. I do wonder how well a general one would fit.
Atleast scanning my pillar made use of the scanner and it's the perfect contour to the pillar, fits snug with no gaps at all.
yes one size fits all. usually means. doesn't quite fit anything.
 
Back
Top